


The Japanese language includes 3 character systems: Kanji, Hiragana, and Katakana. Kanji is an imported Chinese character. Hiragana is the backbone of the Japanese language, and all the Kanji can be written in Hiragana. Katakana is reserved for words of "foreign origin," and the Japanese language uses this system to "read" foreign words. In order to type this complicated language efficiently, the Japanese keyboard layout appears.
In this article, we will explore the Japanese keyboard layout in depth.
What is Japanese Keyboard Layout?
The Japanese keyboard layout is typically the JIS layout, which stands for Japanese Industrial Standard. The layout is designed specifically for inputting Japanese efficiently. It still resembles the QWERTY layout but includes extra keys and different placements for certain punctuation marks.
Key Features of Japanese Keyboard Layout
1. Key Layout
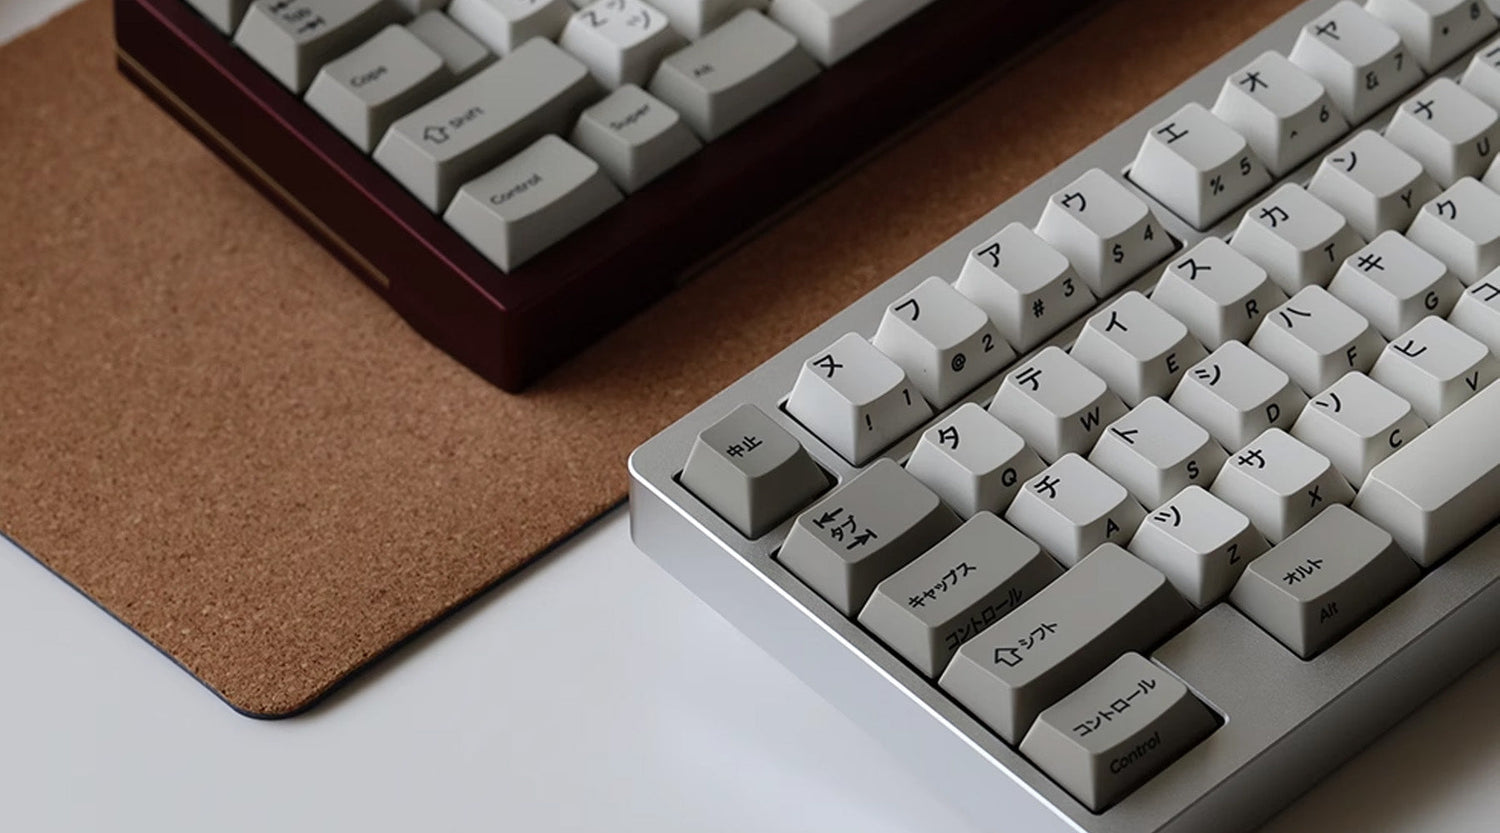
The Japanese keyboard layout places Hiragana and Katakana in the main key area of the keyboard, usually arranged in the order of the 50-sound chart. This design allows users to quickly find and enter the required kana when inputting Japanese, improving input efficiency.
2. Extra Keys
Kana switching keys:
- 半角/全角 (Hankaku/Zenkaku): Toggles between full-width and half-width characters (e.g., between English and Japanese input).
- 無変換 (Muhenkan): Cancels ongoing conversion.
- 変換 (Henkan): Converts Hiragana to Kanji or selects suggestions.
- かな (Kana): Switches to Kana input mode.
3. Extra Symbols and Punctuation
- Japanese uses unique punctuation marks like 「」 and full-width versions of common symbols.
- The layout includes dedicated keys for these, often placed differently than on an English keyboard.
4. Smaller Space Bar
Because of the added function keys, the space bar is often shorter to make room.

Difference Between the Japanese Keyboard Layout and a Standard QWERTY Keyboard
Though the Japanese layout is based on QWERTY, there are some notable differences that set it apart.
Japanese Keyboard Layout: In addition to standard English letters, numbers, and symbols, it includes dedicated Kana keys (Hiragana and Katakana) for direct Japanese character input.
Standard QWERTY Keyboard: Primarily designed for Latin letters, numbers, and symbols, with no built-in support for Japanese kana. Japanese input requires an IME (Input Method Editor) and relies on typing Romaji (Latin characters) for conversion.
Here are the differences between a Japanese keyboard and a standard QWERTY keyboard:
| Feature | Japanese Keyboard (JIS) | Standard QWERTY (ANSI) |
| Standard | JIS (Japanese Industrial Standard) | ANSI (American National Standards Institute) |
| Total Keys(Full Size Keyboard) | 109 keys | 104 keys |
| Extra Keys | Yes (e.g. 変換, 無変換, カナ) | No |
| Kana Input Support | Yes (dedicated Kana characters) | No |
| Spacebar | Shorter (to make room for extra keys) | Longer |
| Key to the Left of 1 | Usually "半角/全角" (switch input mode) | Typically "~ `" |
| Extra Modifier Keys | Yes – for language toggling | No |
| Backslash Key () | Often replaced or moved to a different position | Standard position above Enter |
| Right Shift Key | Smaller (to make room for extra keys) | Full-sized |
| Bracket Placement [ ] | Different position or shared with other symbols | Fixed location next to P |
Related Article:
ANSI vs ISO: What's the Best Keyboard Layout?
Everything You Need to Know About QWERTY Keyboard
Is the Japanese Keyboard Layout Necessary?
Before we talk about the necessity of the Japanese keyboard layout, we have to know the input method for the Japanese.
Here are two methods for inputting Japanese on a keyboard:
- Kana Input: Each key corresponds directly to a Hiragana character (similar to typing on a mobile Japanese keyboard).
- Romaji Input (most common): You type Japanese phonetically using Latin letters, and the IME (Input Method Editor) converts them into Kana or Kanji (e.g., typing "konnichiwa" gives こんにちは).
Most Japanese users—especially younger ones—prefer the Romaji input method, despite requiring more keystrokes. Because the Kana input method takes practice and isn’t as beginer-friendly as Romaji.
So, is the Japanese keyboard layout essential? Our answer is that for most users, it is not necessary.
On one hand, for local everyday typing, the Japanese keyboard layout may not be necessary. ANSI or standard layout with Romaji input works perfectly. On the other hand, if you're a purist or want to type as fast as possible in Japanese, learning the Kana layout can help. This system lets you input kana directly with fewer keystrokes.
How to Type Japanese on a Keyboard?
1. Set Up Japanese Input on Your Device
For Windows:
- Go to Settings > Time & Language > Language.
- Click Add a language and choose Japanese.
- After installation, click on the Language Bar or press Alt + Shift (or Windows + Space) to toggle between English and Japanese.
For Mac:
- Go to System Settings > Keyboard > Input Sources.
- Click +, select Japanese, and choose Romaji or Kana input.
- Switch input with the globe key 🌐 or Cmd + Space.
2. Type Based on the Method You Choose
Typing with Romaji
To type Romaji, just type phonetically in the Latin alphabet. For example:
-
Type “arigatou” → IME converts it to ありがとう.
-
Press the spacebar to toggle between Hiragana, Kanji, or Katakana options and Enter to confirm.
Typing with Kana
In Kana input, each key on the keyboard corresponds to a Hiragana character (like a Japanese typewriter). This method is faster for frequent Japanese typers but requires memorizing the Kana layout.
Conclusion
The Japanese keyboard layout may seem complex at first, but with its combination of Romaji and Kana input methods, it’s designed to make typing in Japanese as smooth and efficient as possible. Whether you’re just getting started or are looking to improve your typing skills, understanding how to use the Japanese keyboard will open up new possibilities for learning the language or working with Japanese content.


Dejar un comentario
Todos los comentarios se revisan antes de su publicación.
Este sitio está protegido por hCaptcha y se aplican la Política de privacidad de hCaptcha y los Términos del servicio.